Tofu Stir-Fry with Veggies: A Quick, Healthy, High-Protein Lunch Recipe

tofu stir fry veg

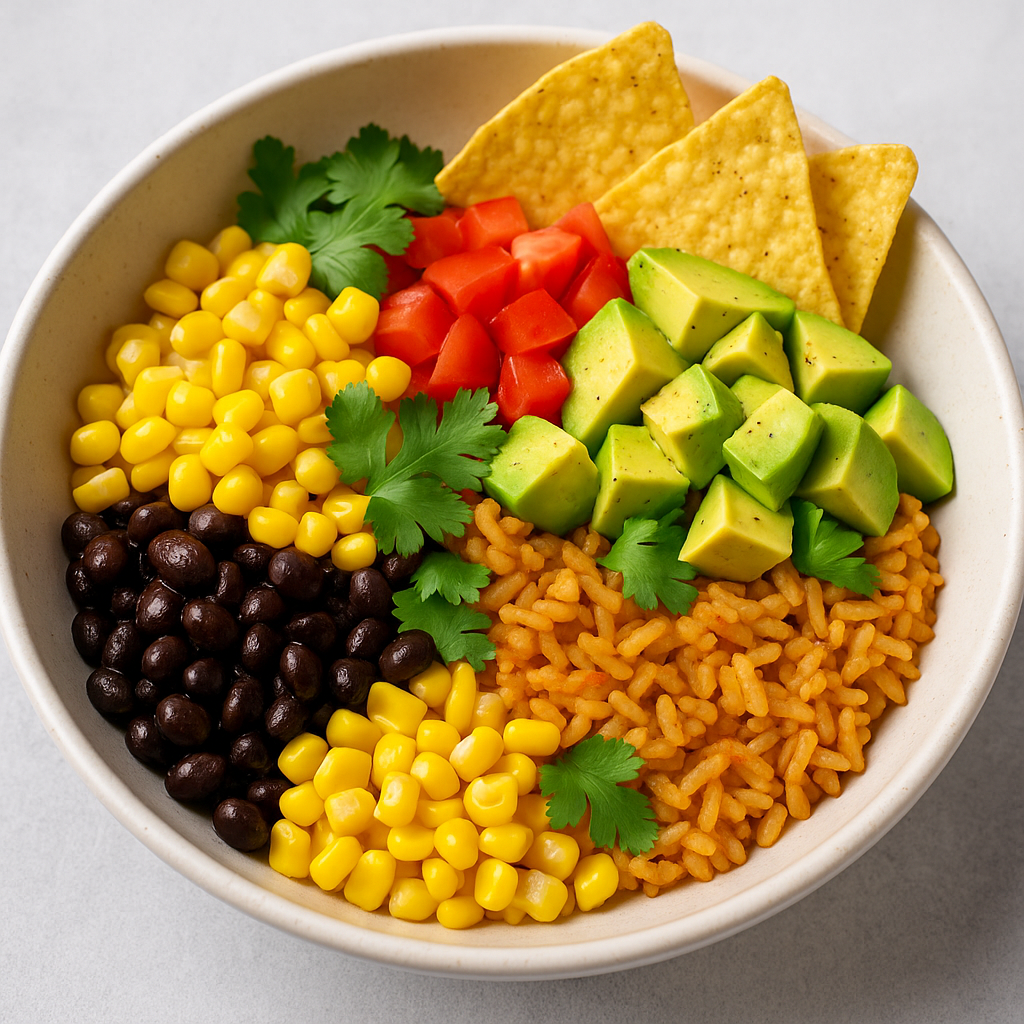
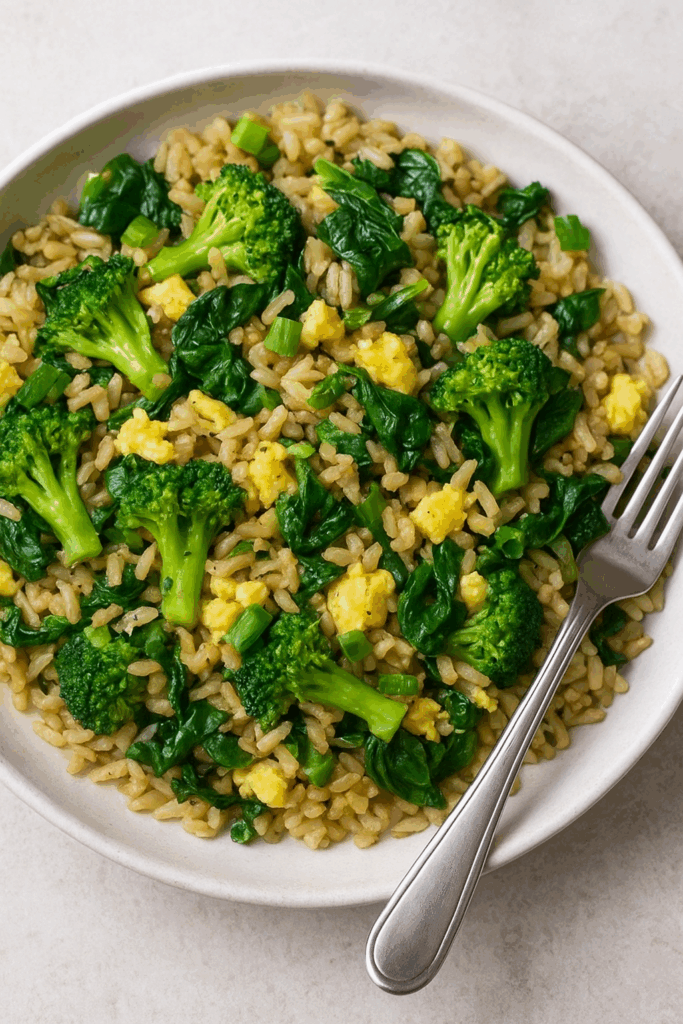
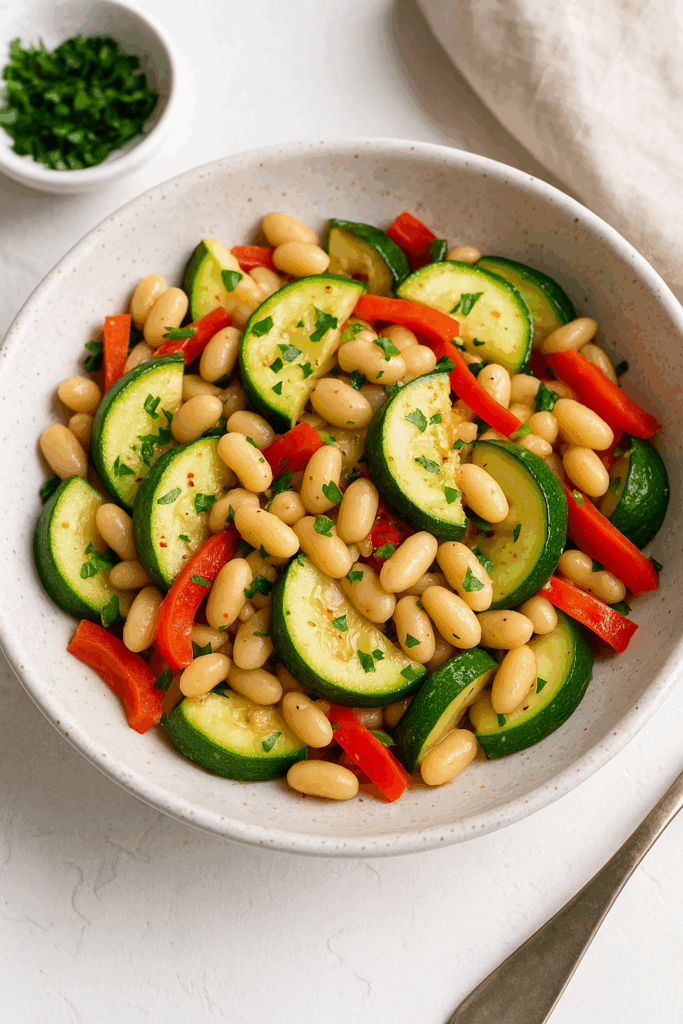
If you’re a vegan and looking for a fast, healthy, and flavourful meal that fits perfectly into a busy lifestyle, this Tofu Stir-Fry with Veggies is about to become one of your favourites. It’s packed with plant-based protein, full of colourful vegetables, and ready in under 20 minutes. Whether you follow a vegetarian diet or simply want a lighter, nutrient-rich meal, this stir-fry ticks every box.

What I love most about this recipe is how versatile and budget-friendly it is. You can easily swap vegetables based on what you have on hand, and tofu is one of the most affordable protein sources available. Even better—this dish is naturally gluten-free (if you use tamari) and incredibly satisfying without feeling heavy.

tofu stir fry with veggies

Why You’ll Love This Stir-Fry

  • High in plant-based protein to keep you full and support muscle health
  • Quick and easy — ready in minutes
  • Packed with nutrients from fresh veggies
  • Budget-friendly and perfect for meal prep
  • Customizable — use any vegetables you like
  • Great flavour thanks to the simple soy-garlic sauce

This is the kind of recipe busy people appreciate: minimal chopping, fast cooking, and delicious results.


Ingredients

Tofu Stir-Fry

  • 1 block firm tofu, pressed and cubed
  • 1 cup broccoli florets
  • 1 carrot, sliced thin
  • ½ red bell pepper, sliced
  • 1 cup snap peas or green beans
  • 1 tbsp sesame oil or olive oil
  • 2 garlic cloves, minced
  • 1 tsp grated ginger (optional but recommended)

For the Sauce

  • 2 tbsp soy sauce or tamari
  • 1 tbsp rice vinegar
  • 1 tsp maple syrup or honey
  • ½ tsp chili flakes (optional)
  • 1 tbsp water

Optional Toppings

  • Sesame seeds
  • Spring onions
  • A squeeze of lime
  • Cooked rice or noodles for serving

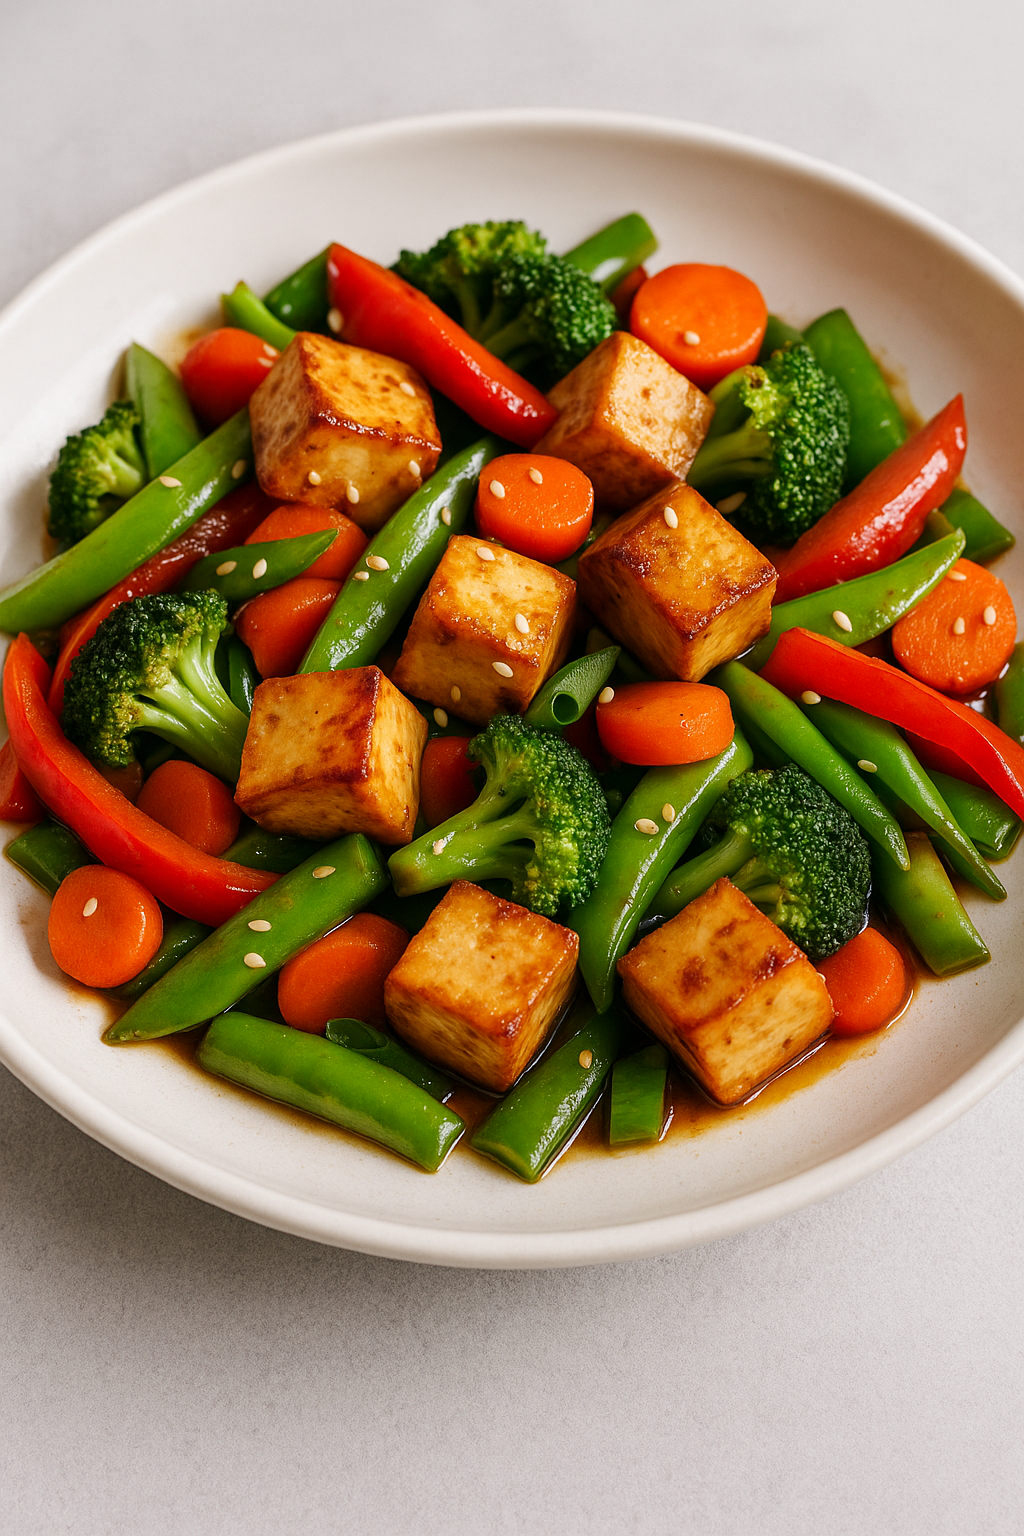
How to Make the Perfect Tofu Stir-Fry

1. Prepare the Tofu

Press the tofu to remove excess moisture — this helps it crisp up nicely. Cut into cubes. Heat half the oil in a pan and add the tofu. Cook for 6–7 minutes, turning occasionally until golden on all sides. Remove from the pan and set aside.

2. How To Stir-Fry Tofu

Stir-frying tofu is quick and simple: press, cube, and pan-fry until golden, then toss with fresh veggies and your favourite sauce. It’s a fast, healthy, protein-rich meal for busy days.

In the same pan, add the remaining oil. Add garlic and ginger, stirring for 30 seconds until fragrant. Add the carrots, broccoli, and snap peas. Cook for 3–4 minutes, then add the bell pepper. Stir-fry until the vegetables are vibrant and tender-crisp.

3. Add the Sauce

Whisk together soy sauce, rice vinegar, maple syrup, and water. Pour the sauce over the vegetables, add the tofu back in, and toss gently to coat. Let everything simmer for 1–2 minutes so the flavours blend.

4. Serve

Serve over steamed rice or noodles, or enjoy as a low-carb bowl. Top with sesame seeds, lime, or spring onions.


Health Benefits of This Dish

This stir-fry is not only delicious—it’s incredibly nutritious.

  • Tofu: Rich in plant-based protein, calcium, and heart-healthy isoflavones
  • Broccoli: Packed with vitamin C, vitamin K, and powerful antioxidants
  • Carrots: Great for eye health, immune support, and beta-carotene
  • Bell Peppers: High in vitamin C for glowing skin and strong immunity
  • Garlic & Ginger: Anti-inflammatory, immunity-boosting, and amazing for digestion
  • Sesame Oil: Contains healthy fats that support brain and heart health

This combination creates a balanced meal with protein, fibre, healthy fats, and essential vitamins — perfect for lunch or dinner.


Serving Suggestions

  • Serve over brown rice for more fibre.
  • Pair with rice noodles for a lighter option
  • Add cashews for extra crunch and protein
  • Sprinkle fresh lime for brightness
  • Double the recipe for easy meal prep

Final Thoughts

This Stir-Fry Tofu with Veggies is the ideal weeknight dinner — fast, healthy, delicious, and customisable. Whether you’re new to plant-based eating or simply want more nutritious meals in your routine, this recipe will quickly become a staple. One pan, simple ingredients, and big flavour — that’s the kind of cooking busy people appreciate.

Boiled Egg Salad with beans– A Simple, High-Protein Lunch Recipe You Can Make in Minutes

When life gets busy, finding a lunch that is quick, healthy, and satisfying can feel challenging. That’s exactly why this hard-boiled egg & bean salad has become one of my go-to meals. I NOTICED I felt energetic and strong. It’s incredibly easy to prepare, packed with protein, full of fresh flavours, and budget-friendly — everything a simple lunch recipe should be.

Hard-boiled egg with bean salad

This salad is perfect for meal prep, post-workout lunches, or days when you want something nourishing without spending hours in the kitchen. With just a handful of wholesome ingredients like beans, eggs, cucumber, and tomatoes, you’ll have a fresh, filling bowl ready to enjoy in minutes.

  • 2 hard-boiled eggs, sliced or chopped
  • 1 cup mixed beans (kidney beans, black beans, or chickpeas)
  • 10 cherry tomatoes, halved
  • ½ cucumber, diced
  • ¼ red onion, thinly sliced
  • 1 tbsp olive oil
  • Juice of ½ lemon
  • Salt & pepper, to taste
  • Fresh parsley, chopped (optional)
  • 1–2 tbsp Greek yogurt (optional for creaminess)

How to Make It

1. Prep the Ingredients

Chop the cucumber, slice the tomatoes, and thinly slice the red onion. Peel and chop your hard-boiled eggs.

2. Combine Everything

In a large bowl, add the beans, tomatoes, cucumber, and onion. Gently mix in the chopped eggs.

3. Add Dressing

Drizzle with olive oil and lemon juice. Season with salt and pepper. Toss gently to combine.

4. Add Optional Toppings

If you like a creamier salad, add a spoonful of Greek yogurt on top. Garnish with chopped parsley.

5. Serve & Enjoy!

Enjoy immediately or refrigerate for up to 24 hours for a refreshing, chilled lunch.


Serving Suggestions

  • Serve with whole-grain toast for extra fibre.
  • Add avocado slices for healthy fats
  • Mix in sweetcorn for sweetness
  • Use as a filling for wraps or pita
  • Add spinach or lettuce to make it more voluminous

🥗 Final Thoughts

Healthy meals don’t need to be complicated, and this Hard-Boiled Egg & Bean Salad proves it. With simple ingredients, a quick prep time, and a nutritious balance of protein and fibre, it’s one of the easiest lunches you can add to your weekly routine. Whether you’re meal prepping for work or just want a light, refreshing lunch at home, this recipe checks every box.

Chickpea Salad: A Simple, High-Protein Lunch for busy days

If you’re searching for a quick, healthy, and protein-packed lunch idea that doesn’t require cooking, this Greek Yoghurt Chickpea Salad will become one of your go-to meals. It’s creamy, refreshing, affordable, and incredibly easy to make — exactly the kind of recipe busy people love. Whether you’re working long hours, trying to eat healthier, or simply want a satisfying meal without much effort, this salad ticks all the right boxes.

Greek yoghurt and chickpea peas salad

Chickpeas and Greek yoghurt make a powerful combination. Chickpeas provide slow-digesting carbohydrates, fibre, and plant-based protein that keep you full for hours, while Greek yoghurt adds creaminess and even more protein without the heaviness of mayonnaise. Tossed with crunchy veggies and fresh lemon juice, this salad is bright, delicious, and nourishing — perfect for lunch, meal prep, or even a light dinner.


  • High in protein and fiber — keeps you full and fuels your energy
  • Budget-friendly — made with simple pantry staples
  • No cooking needed — just mix and enjoy
  • Packed with nutrients from fresh vegetables
  • Perfect for meal prep — stays fresh for 2–3 days
  • Light yet satisfying — ideal for healthy eating goals

If you’re trying to replace heavy lunches with something healthier, try this salad. Chickpea salad recipes are a great place to start.


  • 1 cup cooked chickpeas (or canned, drained and rinsed)
  • ½ cup Greek yogurt
  • ¼ cup diced cucumber
  • ¼ cup chopped celery
  • 2 tbsp chopped red onion
  • 1 tbsp lemon juice
  • 1 tsp olive oil (optional for richness)
  • Salt & black pepper, to taste
  • Pinch of oregano or dill (optional, adds great flavour)
  • Fresh parsley, chopped (optional garnish)

1. Prepare the Chickpeas

If using canned chickpeas, rinse and drain them well. For a creamier texture, lightly mash half of the chickpeas with a fork while keeping the rest whole.

2. Add the Greek Yogurt

Add Greek yoghurt over the chickpeas and mix until they are coated. This creates the creamy base of the salad. 2 tablespoons or as much as you like .

3. Add Your Veggies

Mix in the chopped cucumber, celery, and red onion. These add crunch, freshness, and flavour to balance the creaminess.

4. Add Lemon & Seasoning

Squeeze fresh lemon juice over the mixture and season with salt, pepper, and a pinch of oregano or dill. If you want a richer texture, drizzle in a little olive oil.

5. Mix & Serve

Give everything a final stir, taste, and adjust the seasoning if needed. Garnish with parsley and enjoy immediately or refrigerate for later.


This recipe isn’t just delicious—it’s incredibly nutritious:

Chickpeas

High in plant-based protein and fibre to keep you full and support digestion.

Greek Yogurt

Rich in protein, calcium, and probiotics that support gut health.

Cucumber & Celery

Hydrating, low-calorie vegetables packed with vitamins and antioxidants.

Red Onion

Contains flavonoids that support heart health and reduce inflammation.

Olive Oil & Lemon Juice

Healthy fats and vitamin C to brighten the salad and aid absorption.

Together, these ingredients create a balanced meal with protein, healthy fats, fiber, and essential nutrients.


  • Serve in a wrap or pita bread
  • Spoon over whole grain toast
  • Add to a bed of leafy greens
  • Top with avocado for extra creaminess
  • Pair with rice cakes or crackers for a light lunch

You can even double the recipe and enjoy it over two days — the flavours get better as it chills.


This Greek Yoghurt Chickpea Salad is the perfect example of how healthy eating doesn’t have to be complicated or expensive. With simple ingredients and less than 10 minutes of prep time, you can create a delicious, protein-rich meal that supports your healthy lifestyle routine.

Black Bean & Corn Taco Bowl — A Quick, Healthy, High-Protein Lunch Recipe

When you need a lunch that’s fast, fresh, and satisfying, this Black Bean & Corn Taco Bowl is the perfect choice. It’s colourful, naturally high in plant-based protein, full of fibre, and incredibly easy to make — ideal for busy days when you want something wholesome without spending too much time in the kitchen. Perfect for vegans who are looking for simple lunch ideas.

This bowl is made with simple ingredients like black beans, sweetcorn, tomatoes, and fresh herbs. Everything comes together in under 15 minutes, and the flavours are bold, zesty, and energising. If you’re looking for easy, healthy lunch ideas that are budget-friendly and full of nutrition, this taco bowl will quickly become a weekly favourite.

black bean and taco bowl

Why You’ll Love This Taco Bowl

  • High in plant protein from black beans
  • Rich in fibre, helping with digestion and fullness
  • Budget-friendly — mostly pantry staples
  • Naturally gluten-free and vegetarian
  • Comes together in minutes
  • Customisable — add avocado, Greek yogurt, salsa, rice, etc.
  • Perfect for meal prep

If you enjoy meals that are fresh, colourful, and easy to adjust to your taste, this recipe will fit right into your healthy lifestyle.


Ingredients

  • 1 cup black beans, cooked or canned (rinsed and drained)
  • ½ cup sweetcorn, canned or frozen
  • 10 cherry tomatoes, halved
  • ½ red onion, finely chopped
  • ½ red pepper (optional, chopped)
  • 1 tbsp olive oil
  • Juice of 1 lime
  • ½ tsp cumin
  • ½ tsp paprika
  • Salt & pepper, to taste
  • Fresh coriander or parsley, chopped
  • 1–2 tbsp Greek yogurt (optional topping)
  • Optional additions: avocado slices, cooked rice, lettuce, salsa, jalapeños

How to Make It

1. Prepare the Black Beans

If using canned beans, rinse well to remove extra sodium. Add them to a bowl. For cooked beans, make sure they’re cooled and ready to use.

2. Add the Veggies

Mix in the corn, cherry tomatoes, red onion, and red pepper. You’ll already see the bowl becoming colourful and vibrant.

3. Season the Bowl

Drizzle in olive oil and squeeze fresh lime juice over the top. Add cumin, paprika, salt, and pepper, then mix everything well. The lime and spices are what give this bowl its classic taco-inspired flavour.

4. Add the Fresh Herbs

Stir in fresh coriander or parsley for brightness and extra nutrients.

5. Add Toppings

Top with a spoonful of Greek yoghurt for creaminess, or add avocado, salsa, or shredded lettuce. This step is optional but takes the bowl to another level.

6. Serve & Enjoy

Enjoy immediately, or store in the fridge for up to 2 days — the flavours continue to improve as it sits.

black bean and taco salad

Health Benefits of This Bowl

This recipe is not only delicious but also delivers serious nutrition:

Black Beans

High in protein, iron, and fibre. They support digestion, energy, and overall gut health.

Corn

Provides natural sweetness, antioxidants, and steady energy through healthy carbs.

Tomatoes

Rich in vitamin C and lycopene, great for skin and heart health.

Red Onion

Supports immunity and digestion, adding powerful antioxidants.

Olive Oil

Contains heart-healthy monounsaturated fats that support inflammation reduction.

Greek Yogurt (optional)

Adds protein, calcium, and probiotics for gut health.

This bowl offers the perfect balance of protein, fibre, healthy fats, and fresh vegetables.


Serving Suggestions

Try these variations to keep your meals interesting:

  • Serve over brown rice or quinoa for a filling lunch
  • Add avocado for healthy fats
  • Mix in lettuce or spinach for extra nutrients
  • Top with salsa for a flavour boost
  • Add jalapeños if you like spice
  • Turn it into tacos or wraps

Final Thoughts

This Black Bean & Corn Taco Bowl is proof that healthy eating doesn’t have to be complicated or expensive. When I use it for a few days in my diet, I feel good and energetic throughout the day. With simple ingredients and bold flavours, it’s a lunch that fuels your body, satisfies your appetite, and supports your wellness goals.

Salmon and Brown Rice with Roasted Red Pepper — A Simple, Healthy, High-Protein Meal Recipe

If you’re looking for a healthy, flavour-packed meal that comes together easily, this Salmon and Brown Rice with Roasted Red Pepper recipe is exactly what you need. It’s a balanced, protein-rich dish made with simple ingredients that boost your energy, support muscle health, and keep you full for hours. This is one of those meals that feels restaurant-worthy but is incredibly easy to make at home — ideal for busy weekdays, post-workout dinners, or wholesome weekend meals.

salmon and brown rice lunch

What makes this recipe special is the combination of textures and flavours: tender baked salmon, nutty brown rice, and smoky roasted red peppers. It’s a nutrient-dense meal that tastes amazing while supporting a healthy lifestyle. If you love meals that are simple, satisfying, and nourishing, this recipe will quickly become a regular in your meal rotation.


Why You’ll Love This Recipe

  • High in protein and omega-3 fats
  • Loaded with vitamins and antioxidants
  • Budget-friendly using basic ingredients
  • Perfect for meal prep and reheats beautifully
  • Naturally gluten-free and nutritious
  • A complete balanced meal in one bowl

This is one of those dishes where healthy eating doesn’t feel restrictive — it feels delicious.


Ingredients

For the Salmon
  • 2 salmon fillets
  • 1 tbsp olive oil
  • 1 tsp paprika
  • 1 tsp garlic powder
  • Salt & black pepper, to taste
  • Juice of ½ lemon
For the Brown Rice
  • 1 cup cooked brown rice (or leftover rice)
  • ½ tbsp olive oil or butter
  • Pinch of salt
For the Roasted Red Peppers
  • 1 large red bell pepper, roasted and sliced
    (or use jarred roasted peppers for convenience)
Optional Add-Ins
  • Fresh parsley or coriander
  • A spoonful of Greek yogurt
  • Steamed broccoli or spinach on the side
  • Extra lemon wedges

How to Make Salmon and Brown Rice with Roasted Red Pepper

1. Prepare the Salmon

Preheat your oven to 200°C (400°F). Place the salmon fillets on a baking tray lined with parchment. Drizzle with olive oil, then season with paprika, garlic powder, salt, and pepper. Squeeze fresh lemon juice over the top.

2. Bake the Salmon, OR use an air fryer, which is quicker

Bake for 12–15 minutes, depending on thickness. The salmon should flake easily with a fork and remain tender and juicy inside.

3. Cook or Reheat the Brown Rice

If making from scratch, cook the brown rice according to package instructions. For leftover rice, warm it in a pan with a little olive oil or butter and a pinch of salt. Brown rice adds a nutty flavour and provides long-lasting energy.

4. Roast the Red Pepper

You can roast your own pepper or use a jarred version.
To roast fresh:

  • Slice the pepper in half
  • Remove seeds
  • Place skin-side up under the grill/broiler
  • Cook until the skin blackens
  • Peel off the charred skin once cooled
    Slice into strips.
5. Assemble the Bowl

Layer warm brown rice at the bottom of your bowl. Add sliced roasted red pepper on the side and place the baked salmon on top. Add your favourite fresh herbs or a dollop of Greek yogurt if desired.

6. Serve & Enjoy

This meal is best enjoyed warm, but it also stores well for meal prep.


Health Benefits

Salmon

Rich in omega-3 fatty acids, high-quality protein, and vitamin B12 — great for heart health, muscle recovery, and glowing skin.

Brown Rice

High in fibre and complex carbohydrates, supporting digestion and steady energy levels.

Roasted Red Peppers

Packed with antioxidants, vitamin C, and natural sweetness that boosts the entire dish.

Lemon & Olive Oil

Add antioxidants and healthy fats while enhancing flavour naturally.

Together, these ingredients create a balanced meal that supports overall wellness, energy, immunity, and muscle health.


Final Thoughts

This Salmon and Brown Rice with Roasted Red Pepper recipe is the perfect example of how easy healthy eating can be. With just a few simple steps and whole-food ingredients, you create a meal that’s nutritious, filling, and incredibly flavourful. Whether you’re eating clean, building muscle, or simply want better lunch and dinner options, this recipe fits beautifully into any lifestyle.

Simple, Easy, High-Protein Lunch Ideas

As a man in my 50s, I’ve learnt how important protein is for staying strong, healthy, and active. After a workout, my body needs the right fuel to recover and keep building muscle. High-protein foods help repair tissues, boost strength, and slow down age-related muscle loss. Adding simple, affordable proteins like eggs, tuna, chicken, beans, and Greek yoghurt into my lunches has made a huge difference. I feel stronger, recover faster, and have more energy throughout the day. Prioritising protein has become a key part of maintaining my health and living my best life after 50.


Why Add More Protein to Your Lunch?

Protein does more than build muscle. It keeps you full longer, stabilises blood sugar, supports metabolism, and helps maintain healthy skin, hair, and nails. By adding just one high-protein lunch a day, you’ll feel more energised and less tempted to snack on sugary or processed foods later on.

The good news? You don’t need pricey protein powders or complicated recipes. Everyday foods like eggs, tuna, beans, chicken, cottage cheese, Greek yoghurt, and chickpeas are all affordable, easy to use, and packed with protein.

Easy High-Protein Lunch Ideas

This easy, healthy lunch idea is protein-rich chickpeas, making it perfect for vegetarians or anyone looking for a lighter, budget-friendly option. Creamy Greek yoghurt adds richness without the heaviness of mayo, while crunchy veggies and fresh lemon give it a refreshing lift. It’s simple, filling, and takes less than 10 minutes to prepare — ideal for busy days! Optional: add cayenne pepper.

Greek Yogurt Chickpea Salad

Health Benefits of the Ingredients

  • Rich in plant-based protein to support muscle repair and energy
  • High in fiber, improving digestion and keeping you full longer
  • Helps regulate blood sugar levels
  • Contains iron, magnesium, and folate

Greek Yogurt

  • Excellent source of high-quality protein
  • Supports gut health thanks to probiotics
  • High in calcium, promoting strong bones
  • Lower in fat than mayonnaise with a creamy taste

Cucumber

  • Hydrates the body (almost 95% water)
  • Low in calories yet high in vitamins K and C
  • Helps soothe inflammation and supports skin health

Celery

  • Contains antioxidants that boost immunity
  • Supports digestion and reduces bloating
  • Low-calorie, high-water vegetable perfect for healthy meals

Red Onion

  • Packed with antioxidants, especially quercetin
  • Supports heart health and reduces inflammation
  • Adds prebiotics to support a healthy gut

Lemon Juice

  • High in vitamin C to strengthen the immune system
  • Helps with iron absorption (great when eating chickpeas)
  • Aids digestion and boosts flavor naturally

Olive Oil (optional)

  • Rich in heart-healthy monounsaturated fats
  • Contains anti-inflammatory antioxidants
  • Supports brain and skin health

Parsley

  • High in vitamins A, C, and K
  • Helps reduce water retention
  • Supports detoxification and freshens breath


A cheap, filling, high-protein option.

Health Benefits by Ingredient

Black Beans

  • High in plant-based protein for muscle repair and fullness
  • Excellent source of fiber → supports digestion and stabilizes blood sugar
  • Rich in iron, folate, magnesium, and antioxidants
  • Heart-healthy due to low fat and high soluble fiber

Corn

  • Provides fiber for digestive health
  • Rich in carotenoids (lutein & zeaxanthin) → supports eye health
  • Contains B vitamins for energy metabolism
  • Naturally gluten-free whole grain
black bean taco salad

Greek Yogurt

  • High protein → increases satiety and supports muscle maintenance
  • Contains probiotics → promotes gut health
  • Good source of calcium, potassium, and vitamin B12
  • Great, healthier substitute for sour cream

Brown Rice or Quinoa (whichever your bowl includes)

Brown Rice:

  • Whole grain with fiber to support digestion
  • Contains manganese and selenium
  • Helps maintain steady energy levels

Quinoa:

  • Complete protein with all 9 essential amino acids
  • High in fiber
  • Contains magnesium, iron, and antioxidants

Avocado

  • High in heart-healthy monounsaturated fats
  • Contains potassium (more than bananas)
  • Provides fiber and anti-inflammatory compounds
  • Helps absorption of fat-soluble vitamins (A, D, E, K)

Tomatoes

  • Rich in vitamin C for immunity
  • Contains lycopene → powerful antioxidant linked to heart health
  • Supports hydration due to high water content

Red Onion

  • Contains quercetin → anti-inflammatory and antioxidant
  • Supports digestive health via prebiotic fibers

Cilantro

  • Contains vitamins A, C, and K
  • May support detoxification and reduce inflammation
  • Adds flavor without extra calories

Lime

  • High in vitamin C
  • Aids in digestion
  • Adds bright flavor with no added sugar or fat

Spices (Cumin, chilli powder, Paprika, Garlic)

  • Antioxidant-rich
  • May support metabolism
  • Anti-inflammatory properties
  • Adds flavor without sodium or calories

Salmon & Brown Rice Bowl

Health Benefits by Ingredient

Salmon

  • Rich in omega-3 fatty acids (EPA & DHA): supports heart health, reduces inflammation, and boosts brain function.
  • High-quality protein: Helps with muscle repair and satiety.
  • Vitamins support immunity and bone health.
  • B vitamins (B6, B12, niacin): Aid in energy metabolism and nervous system function.
  • Selenium: An antioxidant important for thyroid function.

Brown Rice

  • High in fibre: supports digestive health, stabilises blood sugar, and improves satiety.
  • Whole-grain complex carbs: Provide steady, long-lasting energy.
  • Magnesium & manganese: Support bone health, metabolism, and antioxidant protection.
  • Contains antioxidants: supports inflammation reduction and heart health.

Roasted Red Pepper

  • Very high in vitamin C: supports immunity and skin health.
  • Rich in antioxidants (beta-carotene and quercetin): help combat oxidative stress.
  • Low-calorie, nutrient-dense: Adds vitamins without increasing calories significantly.
  • Supports eye health: Due to carotenoids like lutein and zeaxanthin.

Perfect for meal prep and packed with omega-3s.

Ingredients:

Why it’s great:

High protein + healthy fats = long-lasting energy.


Fast, flavourful, and vegan-friendly.

tofu stir fry with veg
Ingredients:

Health Benefits of the Ingredients in Tofu Stir-Fry with Veggies

Tofu

  • Excellent plant-based protein source
  • Rich in calcium for strong bones
  • Contains isoflavones that may support heart health
  • Low in calories, high in nutrients
  • Helps maintain muscle mass, especially for vegetarian/vegan diets

Broccoli

  • Packed with vitamins C, K, and folate
  • Contains powerful antioxidants that fight inflammation
  • Supports heart health and digestion
  • High in fiber and low in calories
  • Promotes healthy skin and immune function

Carrots

  • Rich in beta-carotene for eye and skin health
  • Supports immune function
  • Great source of fiber for digestion
  • Contains antioxidants that reduce inflammation

Red Bell Peppers

  • Extremely high in vitamin C
  • Rich in antioxidants like lycopene
  • Supports healthy skin, immunity, and heart function
  • Low calorie but high flavor

Snap Peas or Green Beans

  • Full of fiber to support digestion
  • Good source of vitamins A, C, and K
  • Provide plant-based protein
  • Support bone health and strong immunity

Garlic (if used)

  • Natural anti-inflammatory and antibacterial
  • Supports heart health by improving circulation
  • Boosts immune system
  • Adds big flavour with almost no calories

Soy Sauce (or Low-Sodium Soy Sauce)

  • Adds flavor with minimal calories
  • Contains small amounts of antioxidants
  • Low-sodium versions help reduce salt intake
    (Use in moderation due to sodium content.)

Sesame Oil (optional)

  • Contains healthy monounsaturated and polyunsaturated fats
  • Good for heart and brain health
  • Adds antioxidants that help reduce inflammation
  • Gives the stir-fry a rich, nutty flavor

Sesame Seeds (optional topping)

  • Good source of calcium and magnesium
  • Support bone health
  • Provide healthy fats and plant-based protein
  • Add texture and heart-healthy nutrients

Overall Health Benefits of This Dish

  • High in protein
  • Loaded with fibre
  • Rich in vitamins, minerals, and antioxidants
  • Low in calories but very filling
  • Great for weight management and muscle support

Perfect for anyone wanting a quick, nutritious, budget-friendly lunch or dinner.

  • Firm tofu (pan-fried or air-fried)
  • Mixed veggies
  • Garlic, soy sauce, chili flakes

Tofu is cheap, versatile, high in protein, and absorbs flavour beautifully.


Health Benefits of the Ingredients

1. Hard-Boiled Eggs

  • Excellent source of high-quality protein for muscle repair and strength
  • Contain vitamins A, D, B12, and choline for brain and eye health
  • Provide healthy fats that keep you fuller for longer
  • Support skin, hair, and metabolism

2. Beans (Kidney or Mixed Beans)

  • Packed with plant-based protein and slow-digesting carbohydrates
  • High in fibre, improving digestion and keeping blood sugar stable
  • Support heart health by lowering cholesterol
  • Rich in iron, magnesium, and antioxidants

3. Cherry Tomatoes

  • High in vitamin C and antioxidants that boost immunity
  • Contain lycopene, known for supporting heart and skin health
  • Low in calories and hydrating

4. Cucumber

  • Refreshing and hydrating due to high water content
  • Contains vitamins K and C for bone and immune health
  • Helps reduce bloating and supports digestion

5. Red Onion

  • Rich in anti-inflammatory antioxidants like quercetin
  • Supports heart and gut health
  • Adds prebiotics that fuel healthy gut bacteria

6. Parsley (Optional)

  • Packed with vitamins A, C, and K
  • Helps reduce water retention
  • Provides antioxidants that support detoxification

7. Greek Yogurt or Light Dressing (Optional)

  • Adds extra protein and beneficial probiotics
  • Helps digestion and gut balance
  • Provides creaminess without unhealthy fats

Overall Benefits of This Salad

This simple salad is:
✔ High in protein
✔ Rich in fibre
✔ Full of vitamins and antioxidants
✔ Great for heart, gut, and immune health
✔ Low-cost and perfect for quick lunches

A protein powerhouse you can make in minutes.

Ingredients:
  • 2 hard-boiled eggs
  • 1 cup mixed beans
  • Cucumber, onion, olive oil, lemon
  • Optional: add black pepper, Olive Oil, and cayenne pepper
Why it’s great:

Eggs + beans = double protein + balanced fats and fibre.

Simple Egg Fried Rice with Spinach & Broccoli Recipe


 Egg Fried Rice with Spinach & Broccoli

Egg Fried Rice with Spinach & Broccoli — A Healthy Twist on a Classic

When it comes to comfort food that’s both delicious and nourishing, few dishes beat good fried rice. This Egg Fried Rice with Spinach & Broccoli, made with brown rice, takes the classic takeout favourite and gives it a wholesome, nutritious spin. Packed with fibre, protein, and vibrant green vegetables, it’s a perfect balance of taste and health — ideal for lunch, dinner, or even meal prepping for the week ahead.


Why You’ll Love This Recipe

  • Healthier Alternative: Brown rice adds fibre and a nutty depth of flavour.
  • Quick & Easy: Ready in about 25 minutes with simple ingredients.
  • One-Pan Meal: Minimal cleanup, maximum flavour.
  • Versatile: Works as a main dish or side, and you can customise it with other veggies or proteins.

This recipe combines soft scrambled eggs, crisp broccoli, tender spinach, and aromatic seasonings for a comforting dish that’s satisfying yet light.


🧂 Ingredients

Here’s everything you’ll need:

  • 2 cups cooked brown rice (preferably chilled or day-old for the best texture)
  • You can always use the leftover rice.
  • 2 large eggs, beaten
  • 1 cup broccoli florets, chopped small
  • 1 cup fresh spinach leaves, roughly chopped
  • 2–3 tablespoons cooking oil (olive, avocado, or sesame oil)
  • 2 cloves garlic, minced
  • 1 small onion, finely chopped
  • 2 tablespoons soy sauce (or tamari for gluten-free)
  • 1 teaspoon sesame oil (optional, for flavor)
  • Salt and pepper, to taste
  • Green onions or chili flakes, for garnish (optional)

🍳 Instructions

1. Prepare the Rice

If you haven’t already, cook your brown rice ahead of time. Day-old rice works best for fried rice because it’s slightly dry, preventing the dish from becoming mushy. To make fresh rice usable, spread it out on a tray for 10–15 minutes to cool and dry before cooking.

2. Scramble the Eggs

Heat one tablespoon of oil in a large wok or nonstick skillet over medium heat. Add the beaten eggs, season lightly with salt, and scramble them gently until just set. Remove the cooked eggs from the pan and set them aside.

3. Cook the Vegetables

In the same pan, add another tablespoon of oil. Add the minced garlic and chopped onion, and sauté for 1–2 minutes until fragrant. Toss in the broccoli florets and cook for 3–4 minutes, stirring frequently, until they are bright green and slightly tender but still crisp.

Add the spinach and cook for another minute, just until wilted. Spinach cooks quickly, so be careful not to overdo it.

4. Add the Rice

Push the vegetables to one side of the pan and add the remaining tablespoon of oil. Add the cold brown rice, breaking up any clumps with a spatula. Stir-fry for 3–5 minutes, allowing the rice to heat through and pick up the flavour of the vegetables.

5. Season and Combine

Drizzle in the soy sauce and sesame oil, and toss everything together until the rice is evenly coated. Return the scrambled eggs to the pan, breaking them up into smaller pieces. Stir well to combine all the ingredients. Taste and adjust seasoning with salt, pepper, or a splash more soy sauce if needed.

6. Garnish and Serve

Once everything is hot and fragrant, turn off the heat. Sprinkle chopped green onions or chilli flakes on top for extra colour and flavour.

Serve your egg fried rice hot as a standalone meal or alongside grilled tofu, chicken, or fish.


Tips for Perfect Fried Rice

  • Use cold rice: freshly cooked rice tends to be soft and sticky. Cold rice fries better and gives you that perfect slightly chewy texture.
  • Cook on high heat: stir-frying on high heat adds a slight smoky flavour and keeps the veggies crisp.
  • Don’t overcrowd the pan: give your ingredients space to cook evenly. If needed, cook in batches.
  • Customise it: add edamame, carrots, peas, or bell peppers for extra colour and nutrients.

Nutritional Benefits

This Egg Fried Rice with Spinach & Broccoli is as nourishing as it is delicious:

  • Brown rice provides complex carbohydrates and fibre, keeping you full longer.
  • Eggs deliver high-quality protein and essential vitamins.
  • Broccoli is packed with vitamin C, calcium, and antioxidants.
  • Spinach adds iron, folate, and plant-based nutrients.

Together, these ingredients make a balanced meal that supports energy, muscle health, and digestion — all while satisfying your cravings for comfort food.


Final Thoughts

Healthy doesn’t have to mean bland, and this Egg Fried Rice with Spinach & Broccoli proves it. Every bite delivers a mix of hearty grains, fresh greens, and savoury umami flavour. It’s the kind of dish that tastes indulgent but leaves you feeling great afterward.

Perfect for busy weeknights or quick lunches, this easy one-pan meal brings together the best of both worlds — the comfort of fried rice and the goodness of wholesome, natural ingredients. Make a big batch, store leftovers in the fridge, and enjoy a healthy meal that’s ready whenever you are.

Enjoy the meal.

Mediterranean Tuna Salad: A Simple, Healthy Recipe

If you’re looking for a light yet satisfying meal that’s quick to make, full of nutrients, and bursting with Mediterranean flavour, this Mediterranean Tuna Salad is your perfect choice. It’s a vibrant mix of fresh vegetables, creamy feta, zesty lemon, and hearty tuna — all tossed together in a simple olive oil dressing. Whether you’re preparing lunch for one or need a quick dinner idea, this salad comes together in minutes and tastes even better as it sits.

Mediterranean Tuna Salad Simple Healthy Recipe

Why You’ll Love This Recipe

  • Healthy and Balanced: Packed with lean protein, heart-healthy fats, and colorful vegetables.
  • Quick and Easy: Ready in under 10 minutes — no cooking required! Ideal for busy people Looking for healthy salads recipe
  • Mediterranean Goodness: Olive oil, lemon juice, feta, and fresh produce capture the essence of Mediterranean cuisine.
  • Versatile: Perfect on its own, as a side dish, or even served over greens or whole-grain pasta.

Ingredients

  • 1 can of tuna (preferably in olive oil for richer flavor, but brine works too)
  • 1 cup of cherry tomatoes, halved
  • ½ cucumber, chopped into bite-sized pieces
  • ½ red onion, thinly sliced
  • ½ cup of feta cheese, crumbled
  • 1–2 tablespoons of lemon juice (freshly squeezed is best)
  • 1–2 tablespoons of extra virgin olive oil
  • Salt and freshly ground black pepper, to taste
  • Half a tablespoon of cayenne pepper if you want spicy.

Optional additions for extra Mediterranean flair:

  • A handful of kalamata olives
  • A few leaves of fresh parsley or basil, chopped
  • A pinch of oregano or chili flakes for a little kick

Instructions

1. Prepare the Vegetables

Start by prepping your produce. Slice the cherry tomatoes in half and place them in a large bowl. Chop half a cucumber into small, even cubes — this adds a refreshing crunch to balance the creamy and savory elements of the salad. Thinly slice half a red onion; soaking the slices briefly in cold water will mellow their sharpness while keeping their flavour. Drain and crumble the feta cheese if not already done.

2. Drain the Tuna

Open your can of tuna and drain it lightly if it’s packed in olive oil, or thoroughly if it’s in brine. You want just enough oil to keep the tuna moist without making the salad greasy. Flake the tuna gently with a fork and add it to the bowl with your chopped vegetables.

3. Make the Dressing

In a small bowl, whisk together the lemon juice, olive oil, a pinch of salt, and freshly ground black pepper. The dressing should be bright and tangy, perfectly complementing the richness of the tuna and feta. Taste and adjust the acidity or seasoning to your preference — add more lemon if you like a stronger citrus flavor.

4. Combine Everything

Pour the dressing over the tuna and vegetables. Using a fork or salad tongs, gently toss everything together until well mixed. Be careful not to overmix — you want the tuna chunks to remain intact and the vegetables crisp.

5. Serve and Enjoy

Transfer the salad to a serving bowl or plate. Sprinkle the crumbled feta on top for a beautiful finish. If desired, drizzle a little extra olive oil and garnish with chopped herbs or olives.

You can enjoy this Mediterranean Tuna Salad immediately, but it’s also delicious chilled. Letting it rest in the fridge for about 30 minutes allows the flavors to meld beautifully.


Serving Suggestions

This salad is hearty enough to stand on its own for lunch or dinner. You can also:

  • Serve it on a bed of leafy greens for a lighter meal.
  • Spoon it over toasted whole-grain bread for an open-faced sandwich.
  • Pair it with pita bread or crackers for a satisfying snack.
  • Add cooked quinoa or orzo to make it even more filling.

Nutritional Benefits

This Mediterranean Tuna Salad is a powerhouse of nutrients:

  • Tuna provides lean protein and omega-3 fatty acids for heart and brain health.
  • Olive oil adds healthy monounsaturated fats and antioxidants.
  • Cucumber and tomatoes supply hydration, fiber, and vitamins A and C.
  • Feta cheese adds calcium and a creamy texture with a salty tang.

It’s low in carbs, rich in healthy fats, and perfectly balanced — a truly wholesome meal that nourishes your body while delighting your taste buds.


Final Thoughts

This Simple Mediterranean Tuna Salad is proof that healthy eating doesn’t have to be complicated. With just a few fresh ingredients and a drizzle of olive oil, you can create a dish that’s refreshing, satisfying, and full of flavour.

Perfect for meal prep, quick lunches, or a light dinner — this recipe brings a taste of the Mediterranean to your table anytime. Bon appétit!

Simple Zucchini and Bean Stir-Fry Bowl Recipe

Zucchinis are rich in antioxidants, vitamin C, and potassium. They support digestion, hydration, heart health, and weight management while being low in calories and promoting healthy blood sugar levels.

Zucchini and Bean Stir-Fry dish

Zucchini and Bean Stir-Fry Bowl with Roasted Red Pepper and Brown Rice

If you’re craving a wholesome meal that’s packed with protein, fibre, and vibrant flavour, this Zucchini and Bean Stir-Fry Bowl is your new go-to recipe. It’s colourful, satisfying, and loaded with nutrient-rich ingredients — perfect for a healthy lunch or dinner.

With tender zucchini, hearty red beans, smoky roasted red peppers, and a touch of cayenne for heat, this stir-fry is both comforting and energising. Served over nutty brown rice, it’s a plant-based bowl that delivers balance in every bite.

Let’s get cooking!


Ingredients

For 2–3 servings:

  • 1 cup cooked red beans (or canned red kidney beans, rinsed and drained)
  • 1 large zucchini, sliced into half-moons
  • 1 roasted red pepper, sliced (use jarred or roast your own)
  • 2 cups cooked brown rice
  • 2 tablespoons olive oil (or sesame oil for a nuttier flavour)
  • 2 garlic cloves, minced
  • 1 small onion, thinly sliced
  • ½ teaspoon cayenne pepper (adjust to taste)
  • 1 tablespoon soy sauce (or tamari for gluten-free)
  • ½ teaspoon paprika
  • Salt and black pepper, to taste
  • Juice of ½ lemon or lime
  • Fresh parsley or cilantro, chopped, for garnish

(Optional toppings: sesame seeds, avocado slices, or a drizzle of tahini)


Step-by-Step Instructions

1. Cook the Brown Rice

If you haven’t already, start by cooking the brown rice according to package directions. Brown rice takes longer than white rice, so this step is best done first. Once cooked, fluff it with a fork and set aside.

YOU CAN ALSO USE LEFTOVER RICE.

2. Prepare the Vegetables

While the rice cooks, slice the zucchini and onions, mince the garlic, and chop the roasted red pepper. If you’re roasting your own pepper, simply place it over an open flame or under the broiler until the skin is charred. Peel off the skin, remove the seeds, and slice.

3. Sauté the Aromatics

Heat olive oil (or sesame oil) in a large skillet or wok over medium heat. Add the sliced onions and cook for 2–3 minutes until translucent. Then add minced garlic and sauté for another 30 seconds until fragrant.

4. Add the zucchini.

Toss in the zucchini slices and cook for about 5–6 minutes, stirring occasionally, until they start to soften and get a light golden edge.

5. Stir in the Beans and Roasted Red Pepper

Add the cooked red beans and roasted red pepper slices to the pan. Stir well to combine.

6. Season to Perfection

Sprinkle in cayenne pepper, paprika, salt, and black pepper. Drizzle with soy sauce and stir until everything is evenly coated. Let the flavours mingle for 3–4 minutes, stirring occasionally.

If you like extra heat, add a bit more cayenne or a dash of chilli flakes.

7. Finish with a Zesty Touch

Turn off the heat and squeeze in the lemon or lime juice. This brightens up the dish and balances the smoky-spicy notes beautifully.

8. Assemble the Bowl

Scoop a generous serving of brown rice into your bowl. Top it with the zucchini and bean stir-fry mixture. Garnish with fresh parsley or cilantro, and finish with any optional toppings you like — sesame seeds or avocado slices are both excellent choices.


🌿 Tips & Variations

  • Add extra veggies: bell peppers, mushrooms, or baby spinach would all work wonderfully.
  • Boost the protein: toss in tofu or tempeh cubes for an even heartier meal.
  • Make it spicy: add chilli oil or a bit more cayenne for extra fire.
  • For crunch: Sprinkle roasted nuts or seeds on top.

💚 Why You’ll Love This Recipe

This Zucchini and Bean Stir-Fry Bowl is a perfect balance of taste and nutrition.

  • Zucchini adds freshness and lightness.
  • Red beans provide plant-based protein and fibre.
  • Roasted red peppers bring smoky sweetness.
  • Brown rice offers slow-digesting carbs that keep you full and energised.
  • And that touch of cayenne? It adds just the right kick to wake up your taste buds.

The best part is how simple and customisable it is — ideal for busy weeknights or meal prep. Plus, it’s entirely vegan, dairy-free, and gluten-free, making it suitable for just about everyone


Simple Healthy Chickpea Salad with Roasted Red Pepper Recipe

If you’re looking for a salad that’s both hearty and refreshing, this Roasted Red Pepper and Chickpea Salad is the perfect choice. It combines the smoky sweetness of roasted red peppers with the cool crunch of cucumber and the subtle bite of red onion, all tied together with a simple olive oil dressing. Packed with plant-based protein from chickpeas, this salad is satisfying enough to serve as a main dish, yet light enough to pair with grilled chicken, fish, or a sandwich.

The beauty of this recipe lies in its simplicity. With just a handful of wholesome ingredients, you can prepare it in under 20 minutes (especially if you use jarred roasted red peppers). It’s naturally vegan, gluten-free, and bursting with Mediterranean flavour.

chickpeas salad with roasted pepper

🛒 Ingredients

Serves 4

  • 1 can (15 oz / 425 g) chickpeas, drained and rinsed
  • 2 large red bell peppers, roasted and peeled (or 1 cup jarred roasted red peppers, drained)
  • 1 medium cucumber, diced
  • ½ small red onion, finely sliced or diced
  • 3 tablespoons extra virgin olive oil
  • 1 tablespoon red wine vinegar (or lemon juice for a citrusy twist)
  • ½ teaspoon salt, or to taste
  • ¼ teaspoon freshly ground black pepper
  • ¼ teaspoon smoked paprika (optional, to enhance the roasted flavor)
  • A handful of fresh parsley, chopped
  • Optional add-ins: crumbled feta, olives, or cherry tomatoes

Roasting the Red Peppers

If you’re roasting your own red peppers, here’s how:

  1. Place the red peppers in an air fryer for a few minutes until soft. usually 5 mins. OR Bake in the oven
  2. Preheat the oven to 450°F (230°C).
  3. Place the whole red peppers on a baking sheet lined with foil or parchment paper.
  4. Roast for about 20–25 minutes, turning occasionally, until the skin is blistered and charred.
  5. Remove from the oven and place the peppers in a bowl. Cover with a lid or plastic wrap for 10 minutes — this helps loosen the skins.
  6. Peel off the skins, remove the seeds and stems, and cut the flesh into strips or bite-sized pieces.

If you’re short on time, using jarred roasted red peppers works just as well.


🥣 Preparing the Salad

  1. Prepare the chickpeas: drain and rinse them thoroughly under cold water. Pat them dry with a clean towel or paper napkin to remove excess moisture. Boil the chickpeas for 10 mins. Optional.
  2. Chop the vegetables: dice the cucumber, slice the red onion thinly, and cut the roasted red peppers into small pieces.
  3. Mix the dressing: In a small bowl, whisk together the olive oil, red wine vinegar (or lemon juice), salt, black pepper, and smoked paprika.
  4. Combine everything: In a large salad bowl, add the chickpeas, roasted red peppers, cucumber, and red onion. Pour the dressing over the top.
  5. Toss gently until all the ingredients are evenly coated. Taste and adjust the seasoning with more salt, pepper, or vinegar if needed.
  6. Add parsley: Sprinkle the chopped parsley over the salad and give it one final toss.

🍽️ Serving Suggestions

This salad can be enjoyed immediately, but it tastes even better after chilling in the refrigerator for 30 minutes. The flavours meld beautifully as the chickpeas absorb the dressing and the roasted peppers release their sweetness.

  • Serve it as a light lunch with crusty bread or pita.
  • Pair it with grilled meats or seafood for a balanced dinner.
  • Spoon it over mixed greens or quinoa for extra volume.
  • Add crumbled feta or goat cheese for a tangy twist.
  • Also can be served with Greek yoghurt for added proteins

Storage Tips

Store leftovers in an airtight container in the refrigerator for up to 3 days. Stir before serving to redistribute the dressing. Avoid freezing, as the cucumber will lose its crisp texture.